
Your Okta admin creates a new SAML 2.0 app integration inside Okta using the Single Sign-On URL and Audience URI from Tilt, then sends the resulting Okta values back so you can finish the connection in Tilt.
Who this applies to / Prerequisites
- Whoever has admin access to your company's Okta account — usually an IT admin.
- The Single Sign-On URL and Audience URI (SP Entity ID) from Tilt's Security page (see "How do I set up SSO with Okta for my company's Tilt account?").
- Optional: the Tilt logo, downloadable from the Single Sign On page in Tilt, if you want to upload it to the Okta app tile.
Steps
- In a separate browser tab or window, log into your Okta account with admin access.
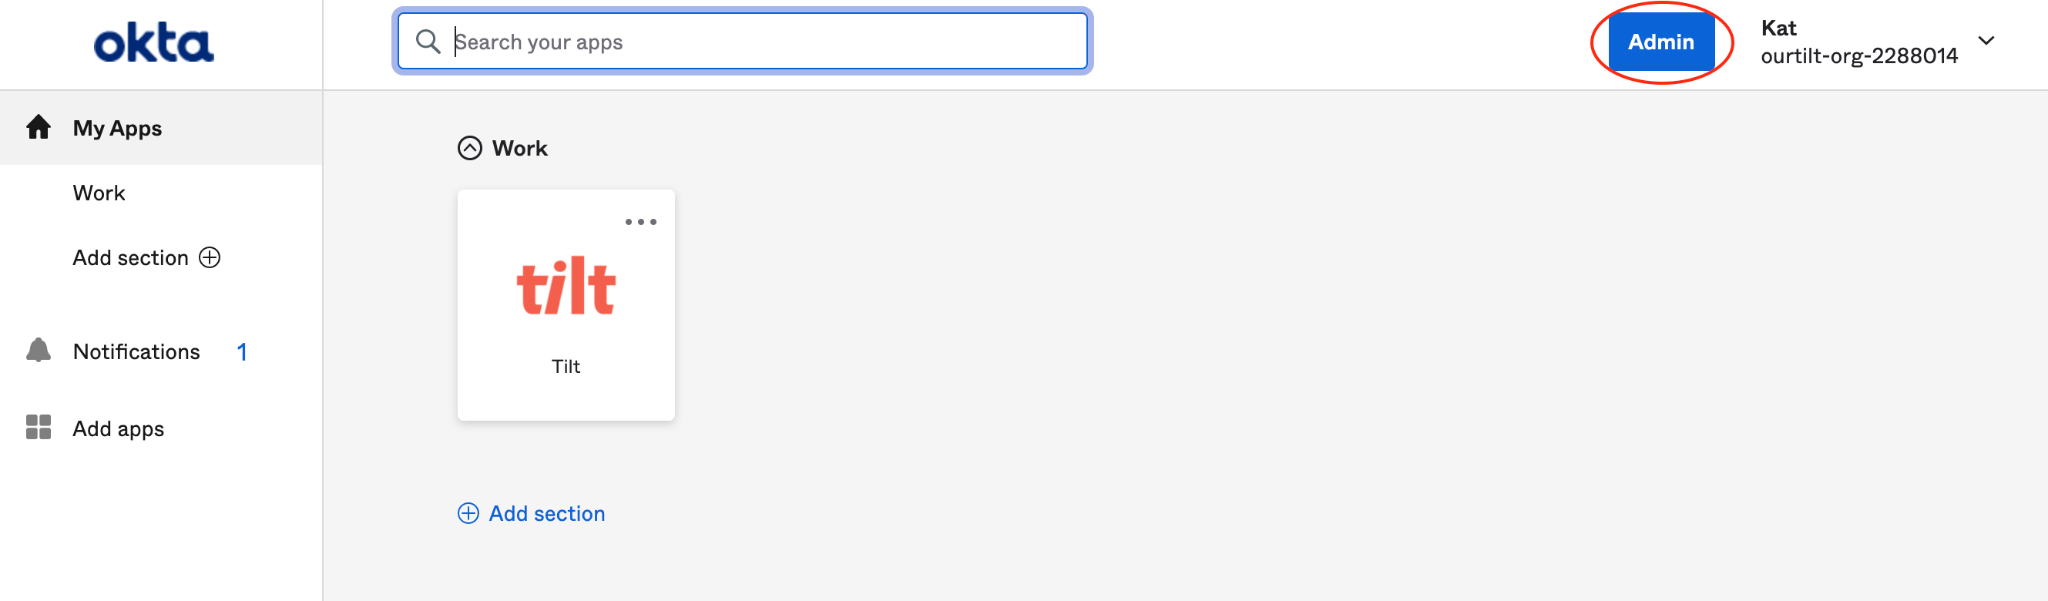
- Confirm you're in the Admin view of Okta. If not, click Admin.
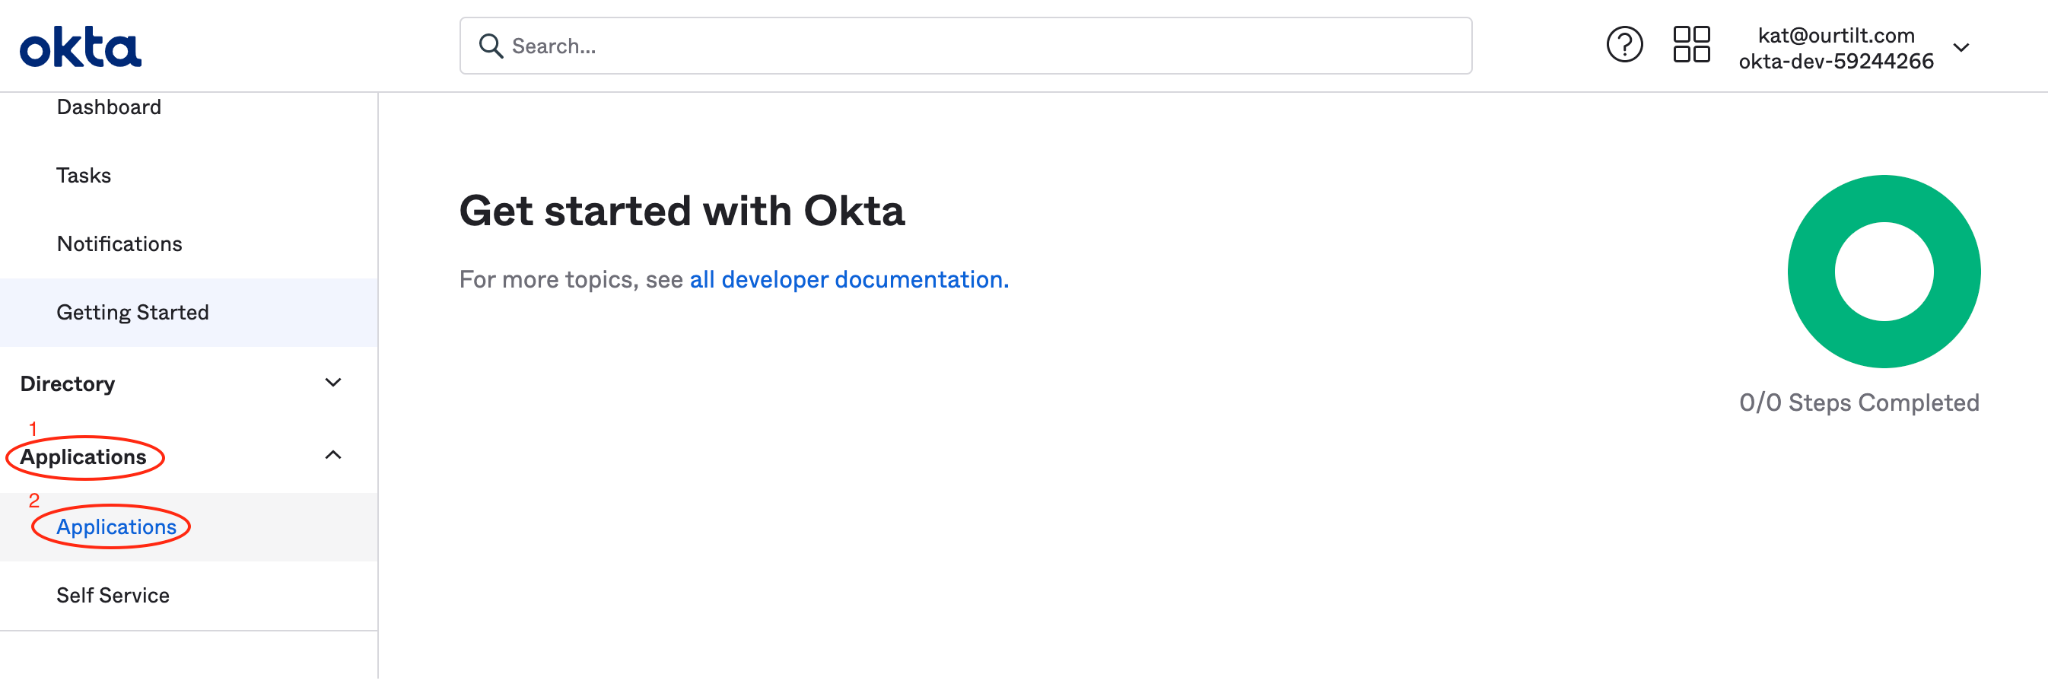
- In the left-hand navigation panel, scroll to Applications, click it to expand the menu, then click Applications again.
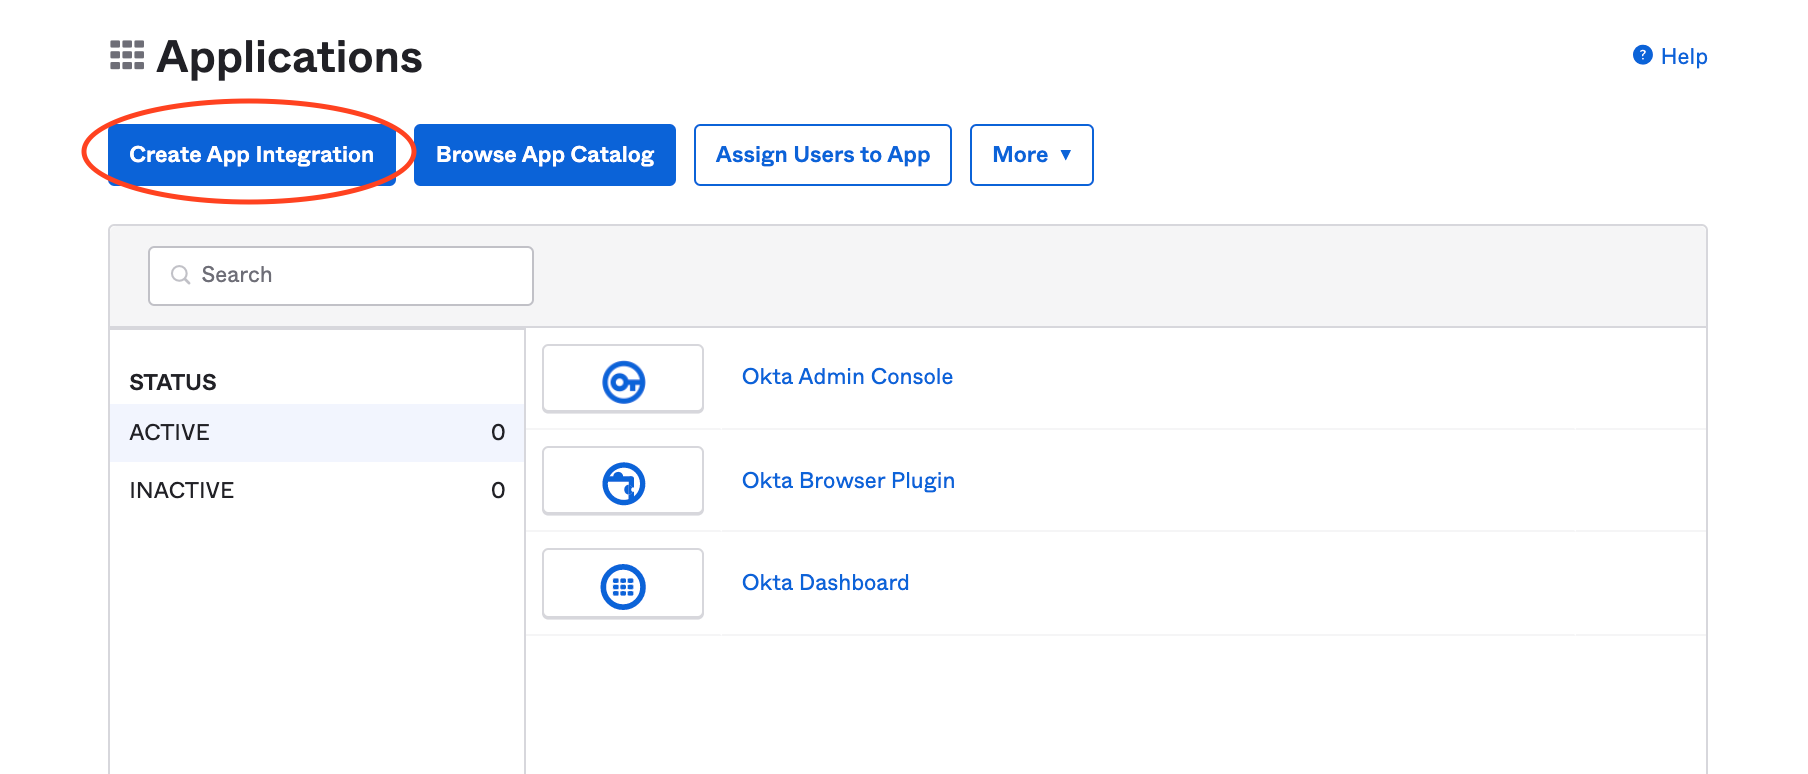
- Click Create App Integration.
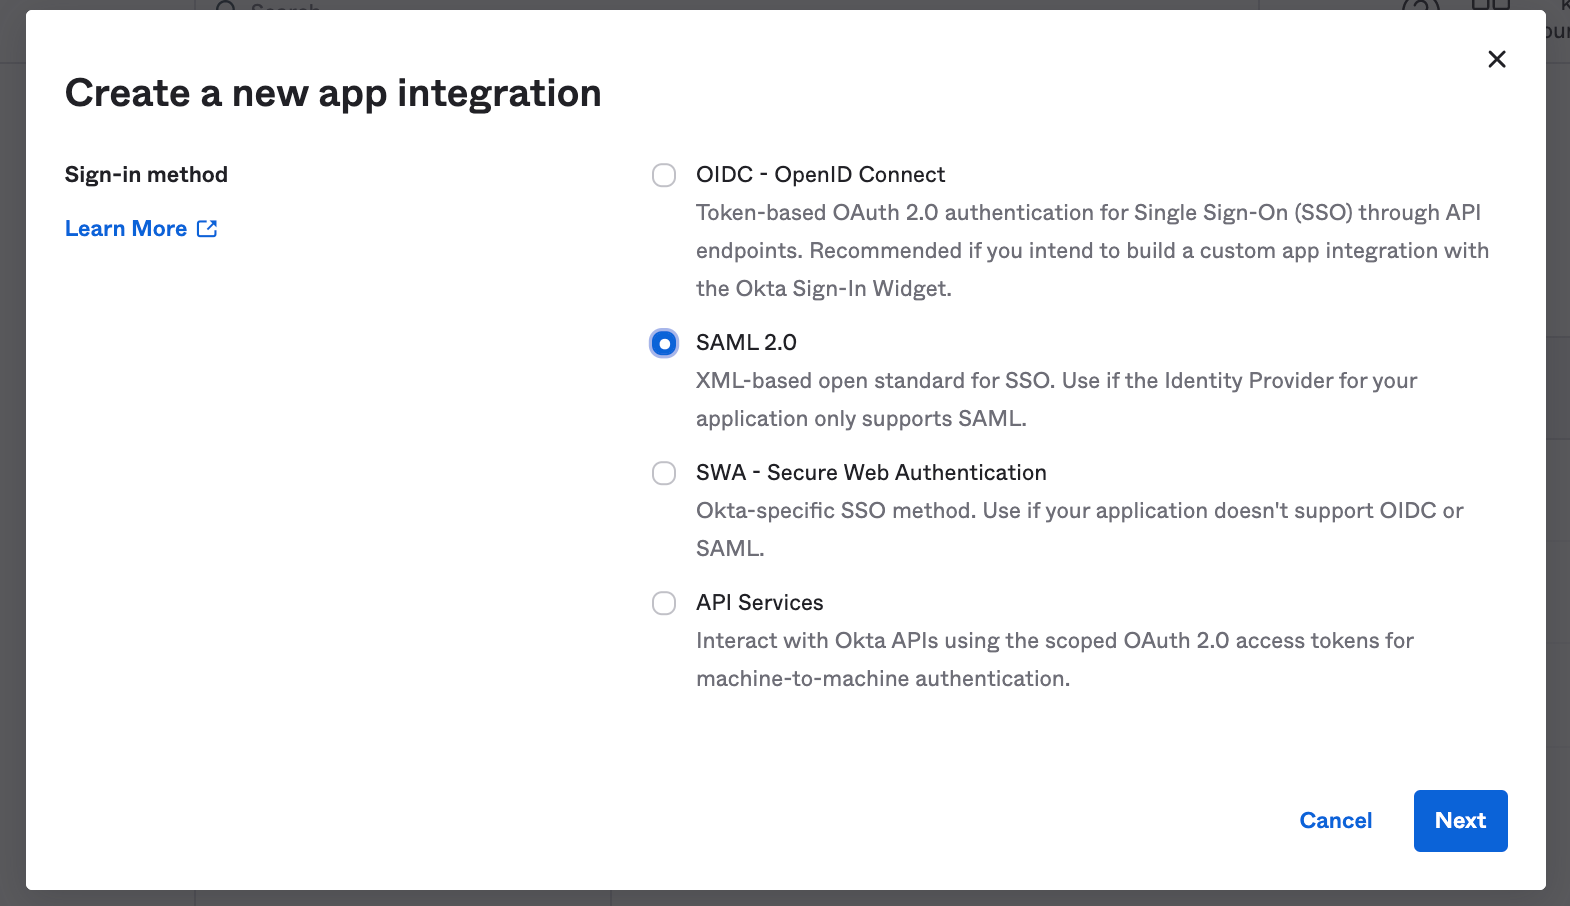
- Select SAML 2.0 as the sign-in method, then click Next.
- On the General Settings screen, enter Tilt as the App Name and upload the Tilt logo if you have it. Leave the App visibility checkboxes blank. Click Next.
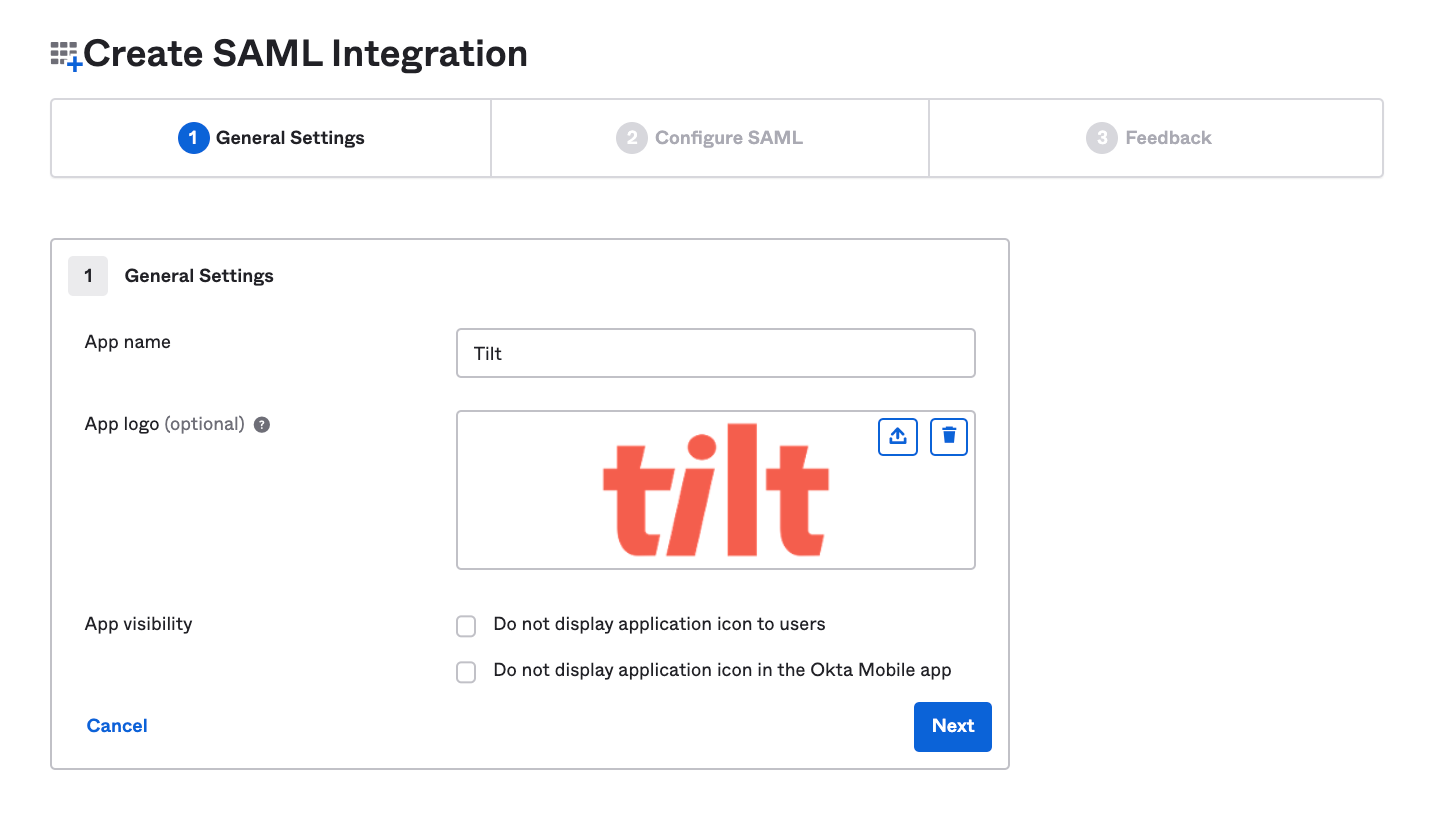
- On the Configure SAML screen, enter the values from Tilt under SAML Settings:
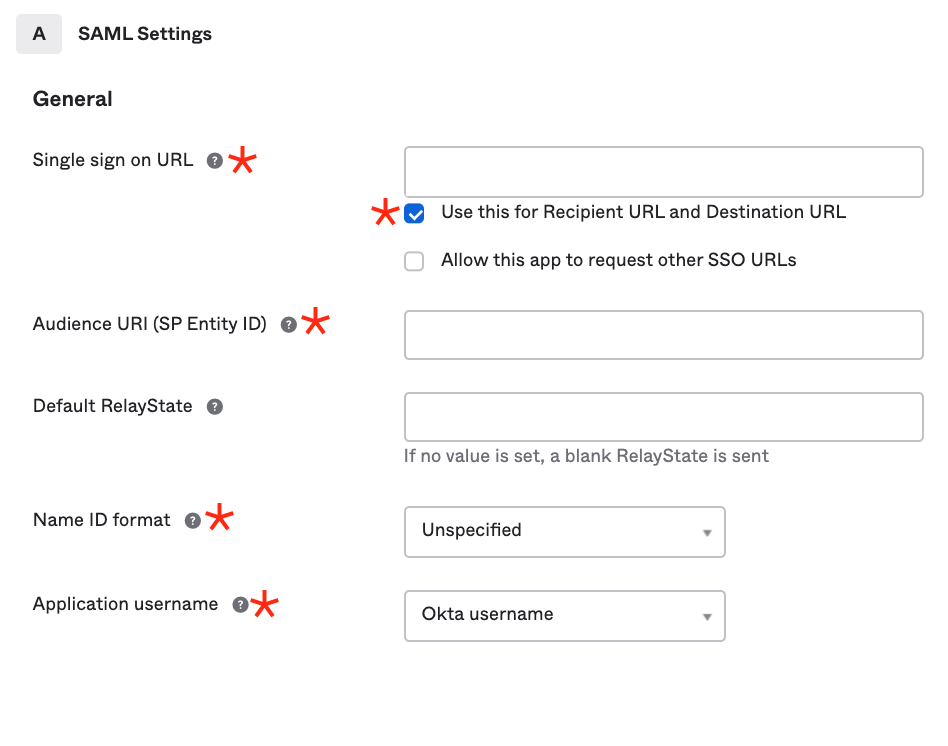
- Single sign-on URL: paste the value from Tilt. Check the box for "Use this for Recipient URL and Destination URL." Leave the second checkbox unchecked.
- Audience URI (SP Entity ID): paste the value from Tilt.
- Name ID Format: select EmailAddress.
- Application username: select Okta username.
- In the Attribute Statements section, add these three attributes exactly as written (case-sensitive):
- Name: firstName, Name format: Unspecified, Value: user.firstName
- Name: lastName, Name format: Unspecified, Value: user.lastName
- Name: email, Name format: Unspecified, Value: user.email
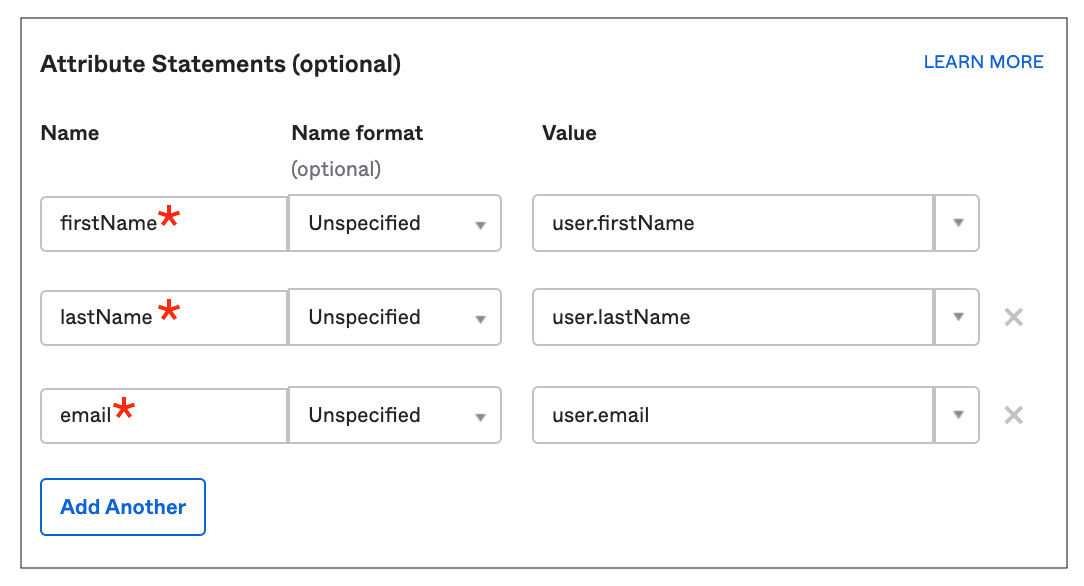
- You don't need to fill in Group Attribute Statements or the "Preview the SAML assertion" section.
- Click Next.
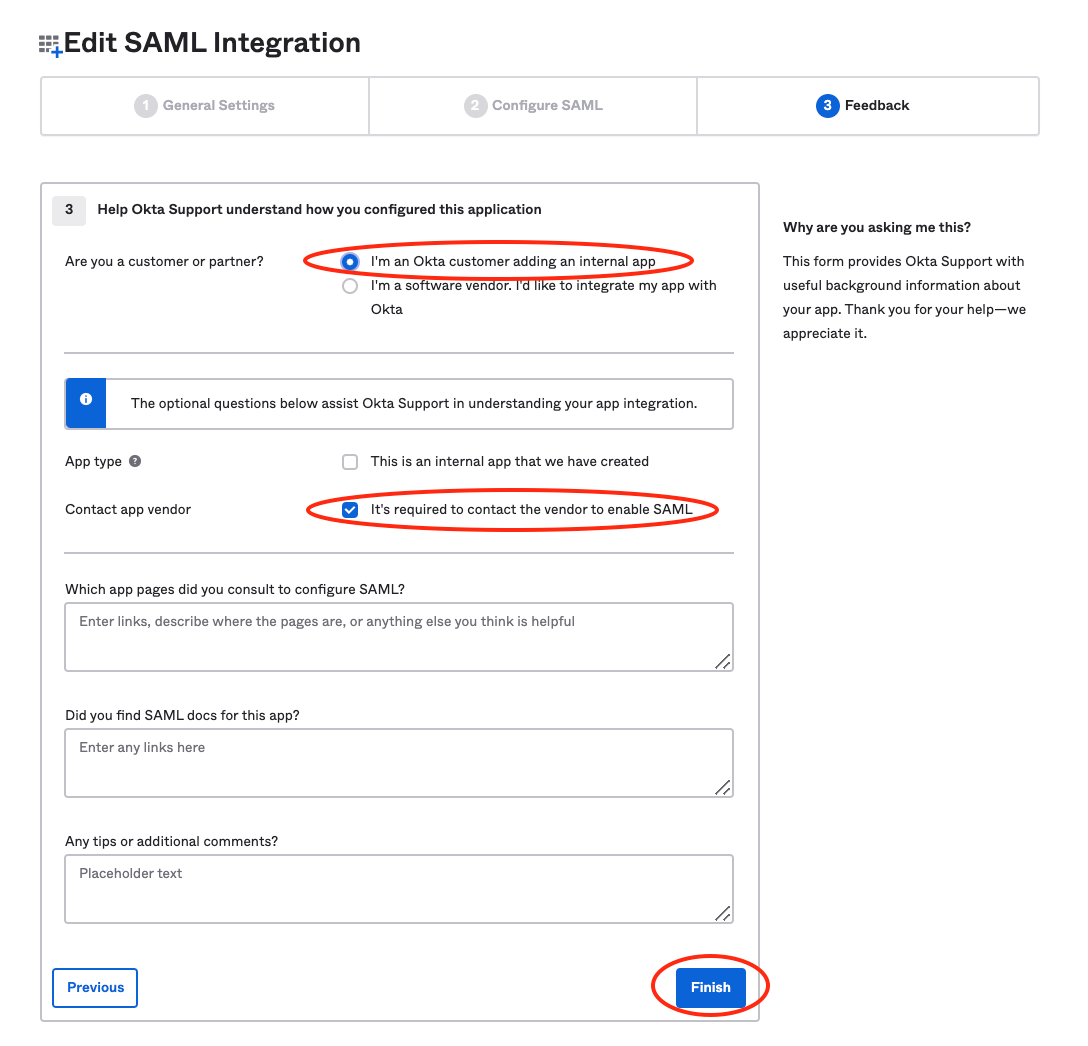
- On the Feedback screen, leave the default selections as-is, then click Finish.
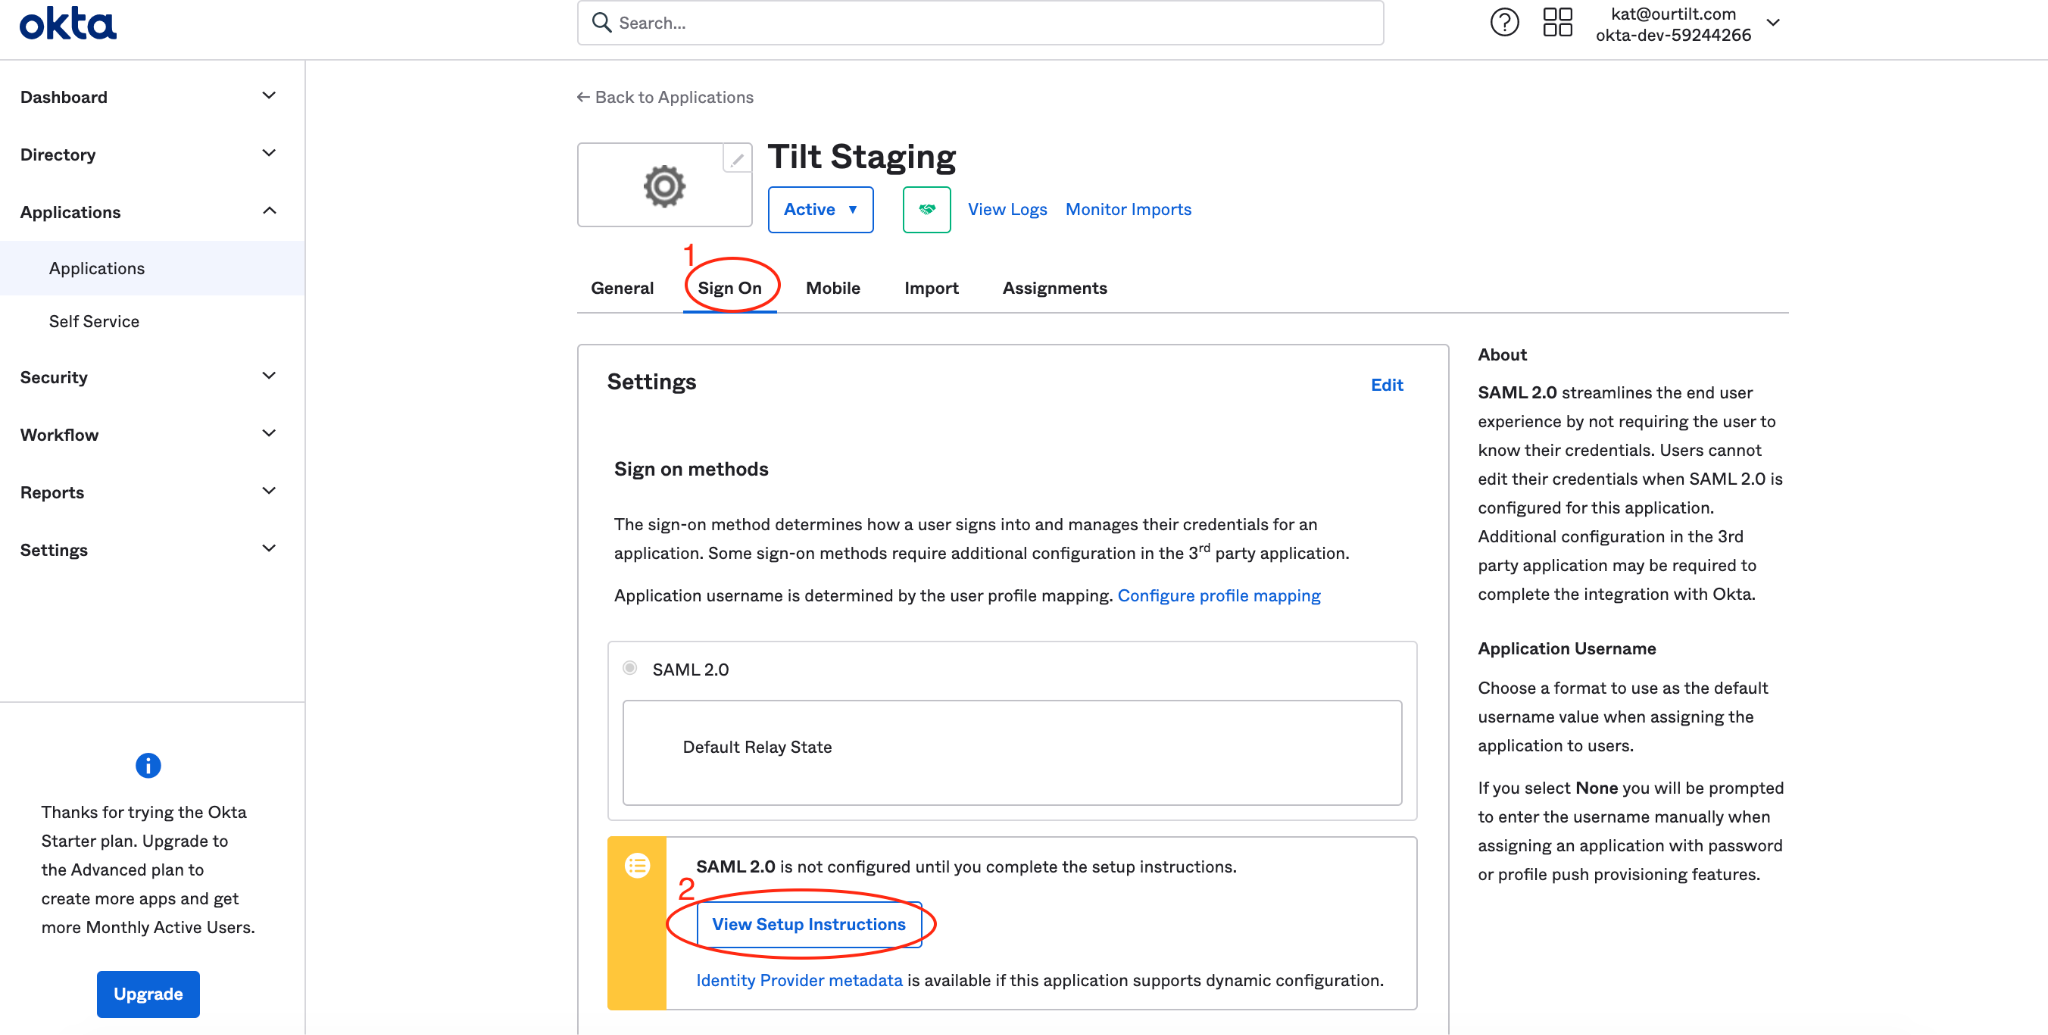
- On the Sign On tab, click View Setup Instructions.
- Copy the Identity Provider Single Sign-On URL and Identity Provider Issuer shown on this page.
- Click the Download certificate below the X.509 Certificate section. Okta saves the file as okta.cert in your downloads folder.
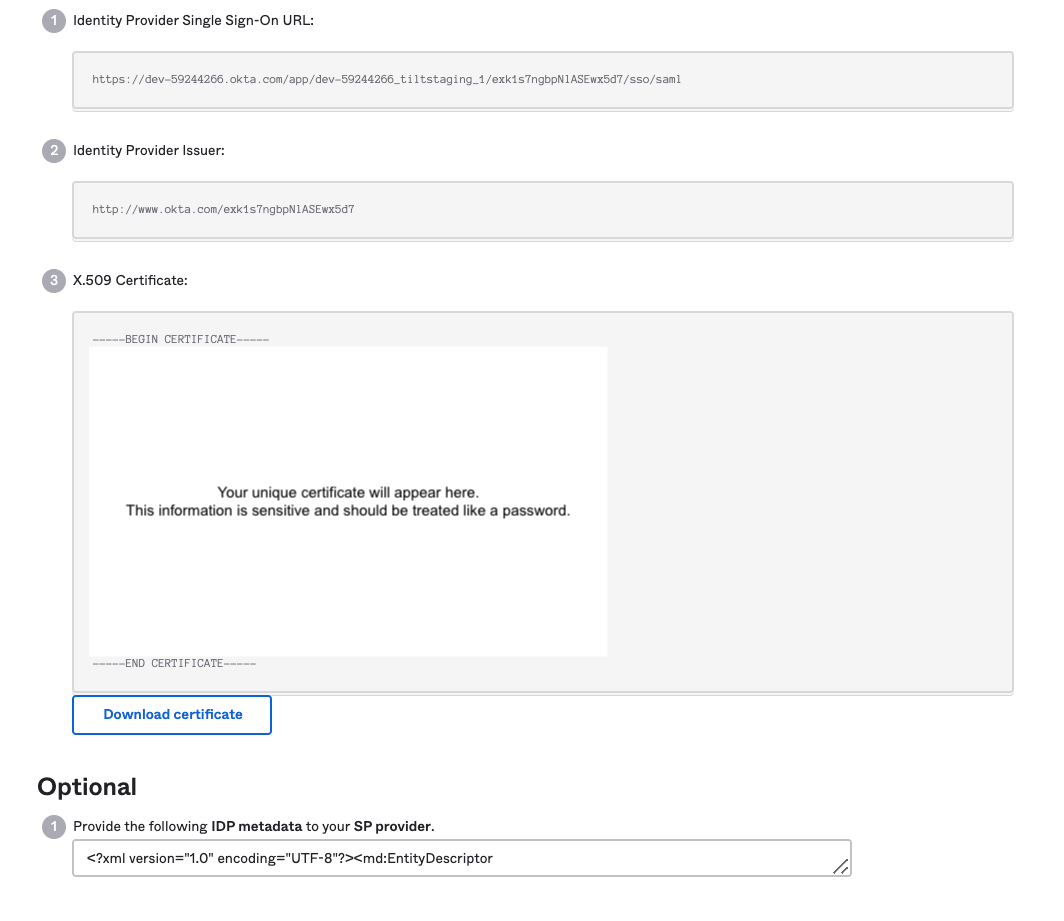
- Send the Identity Provider Single Sign-On URL, Identity Provider Issuer, and the okta.cert file to whoever is finishing setup in Tilt — see "How do I set up SSO with Okta for my company's Tilt account?" for where these go.
What if it doesn't work
- If the Attribute Statements you entered don't match what Tilt expects, double-check the exact spelling and casing of firstName, lastName, and email — Okta treats these as case-sensitive.
- If you don't see Create App Integration, confirm you're in the Admin view, not the standard Okta dashboard.
- If the certificate download doesn't start, go back to the View Setup Instructions page — the download button sits directly below the X.509 Certificate section.
- If employees still can't log in after both sides are set up, confirm you've assigned the Tilt app to those users inside Okta (see Limits below).
- Contact Tilt Support if setup doesn't complete despite following these steps.
Limits and exceptions
- Creating the app integration doesn't automatically give employees access. You still need to assign the Tilt app to users inside Okta — follow Okta's help center article on assigning apps to users.
- You can't skip the Attribute Statements section. Tilt requires firstName, lastName, and email to match users correctly at login.
- This step happens entirely in Okta. Tilt admin access alone doesn't let you complete it — you need Okta admin access.
Related questions
- How do I set up Single Sign-On (SSO) with Okta for my company's Tilt account?